Eaglesoft
1. Install the IOC Snapshot software. If you need a link for the download it is:
https://iocsnapshot.com/IOC_Snapshot.exe
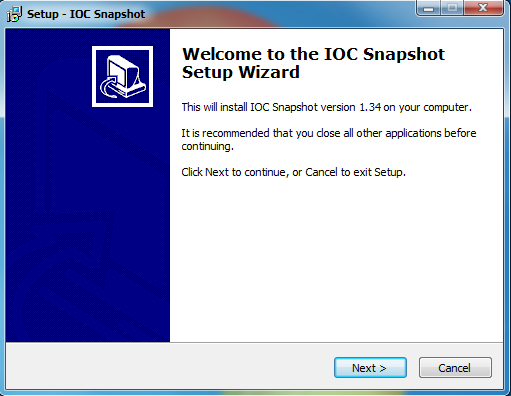
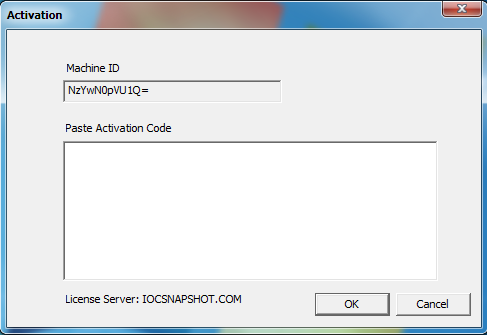
Enter in the license key when you see this window. If you would like to use a trial key, this one is good for 2 weeks.
846S-95GY-DWQ4-CU35-2YHD-H8VX-14C6-2UWZ
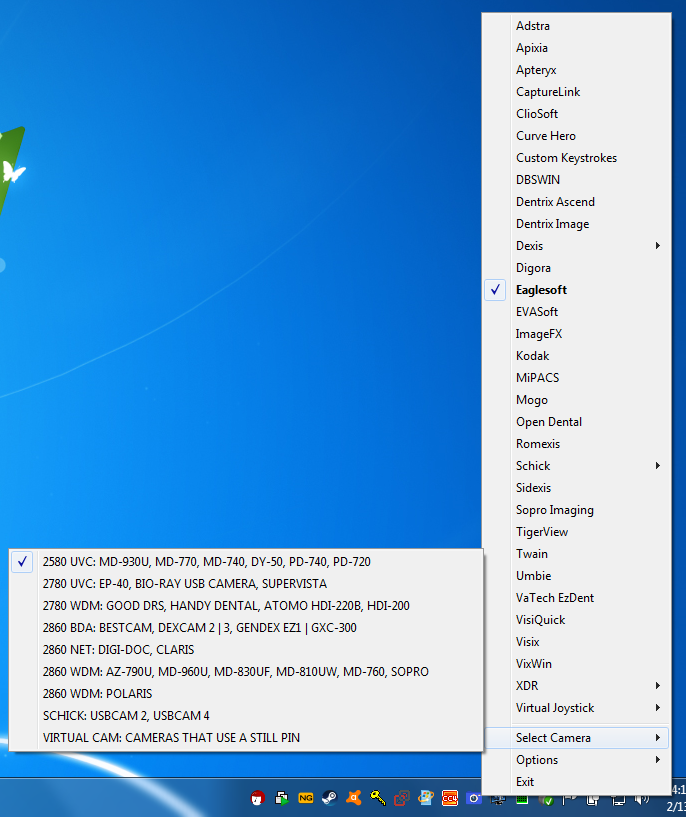
2. After the installation you will see a blue camera icon in your system tray, right click it and select Eaglesoft in the list of programs. Right click the blue camera again and go to Select Camera, and choose the camera you want to work with. The checkmark boxes should look similar to this:
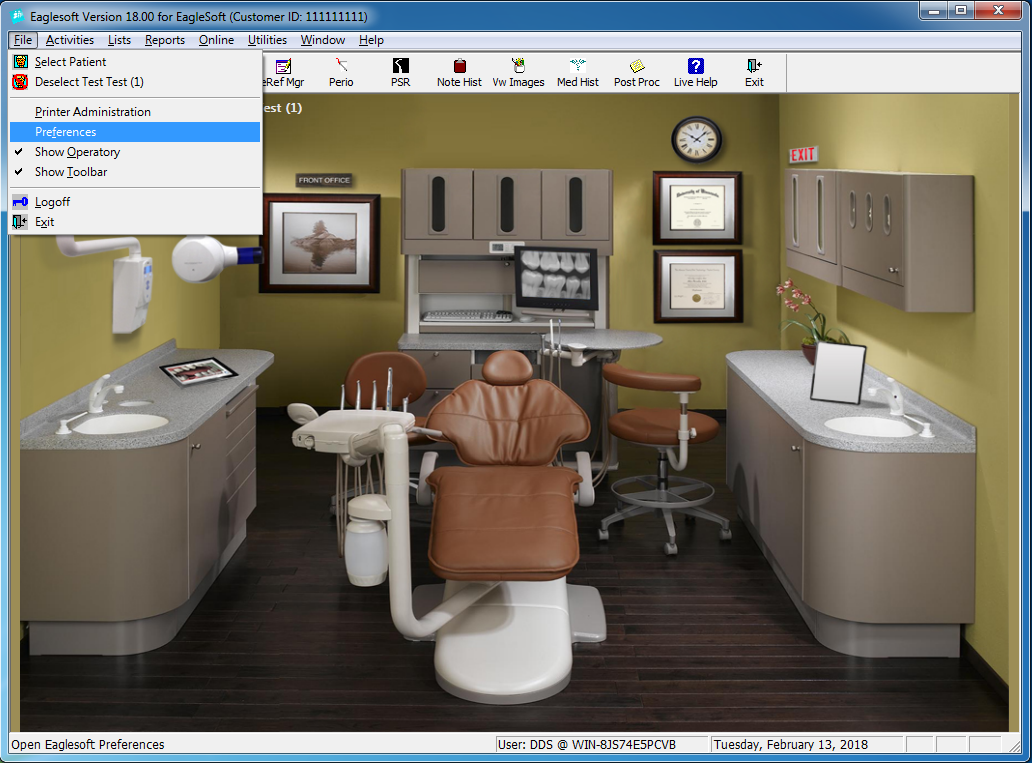
3. Run Eaglesoft and go to File and then Preferences.
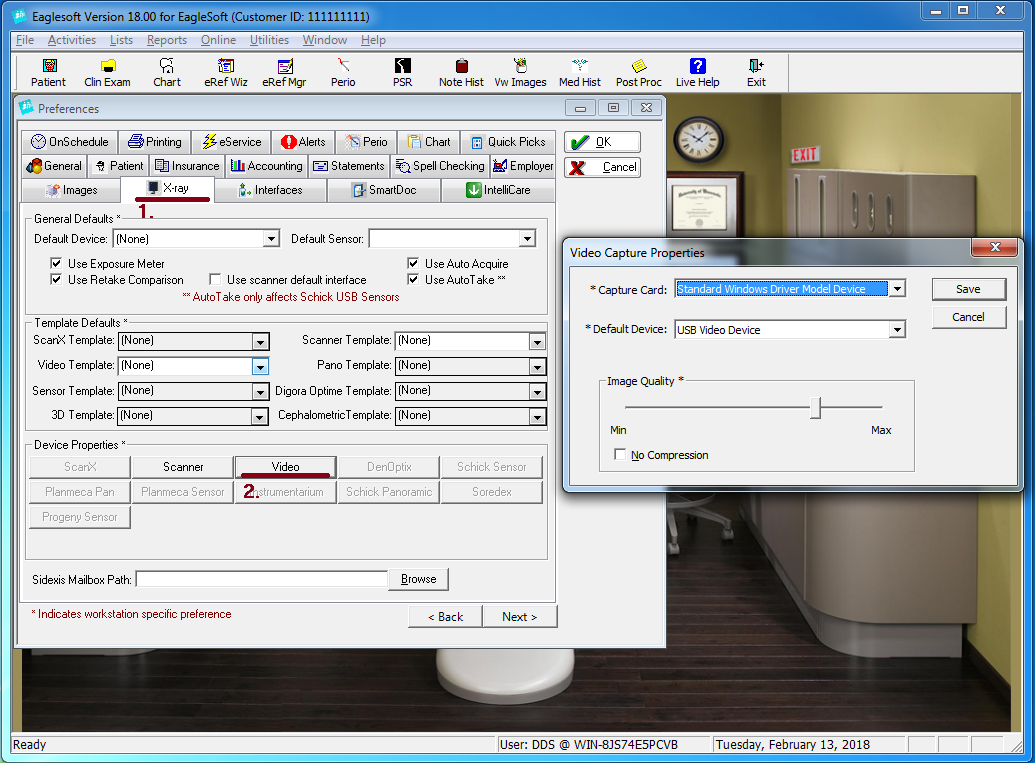
4. Click on the X-Ray Tab, then hit the Video button. The Video Capture Properties window will pop up. Change the Capture Card drop down menu to say Standard Windows Driver Model Device. Then change the Default Device drop down menu to the name of your camera. Click Save and then click the OK button on the Preferences window.
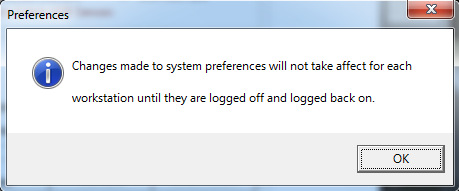
If you see this window, just click OK, you don’t have to restart Eaglesoft for this setting change to go into affect.
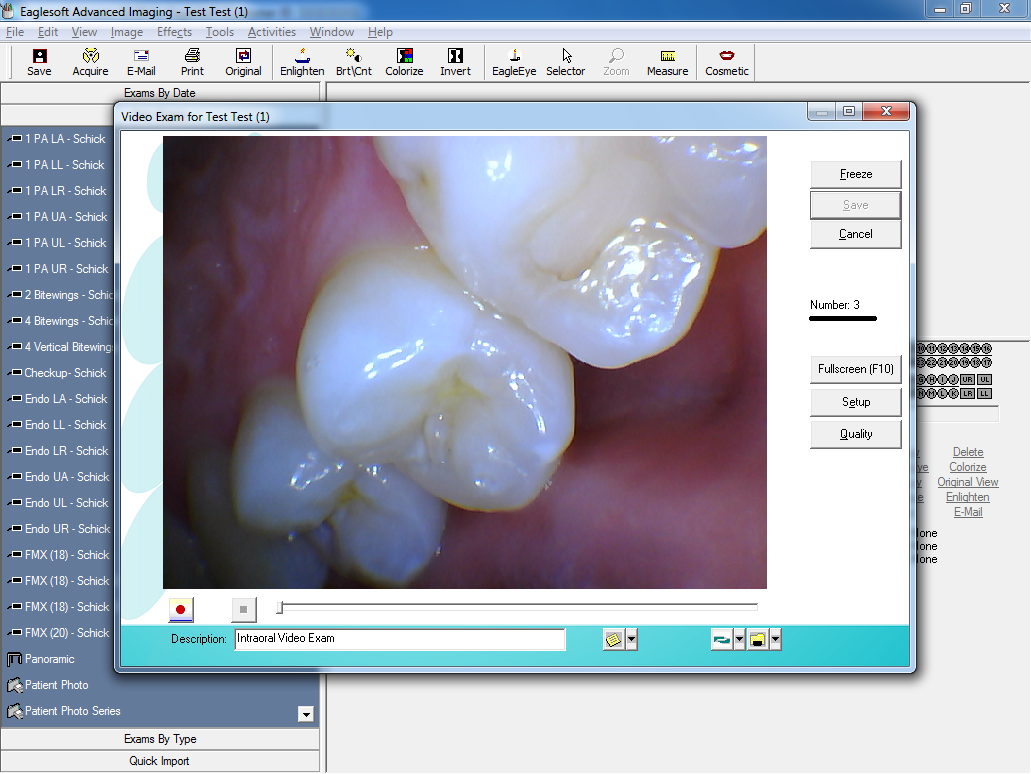
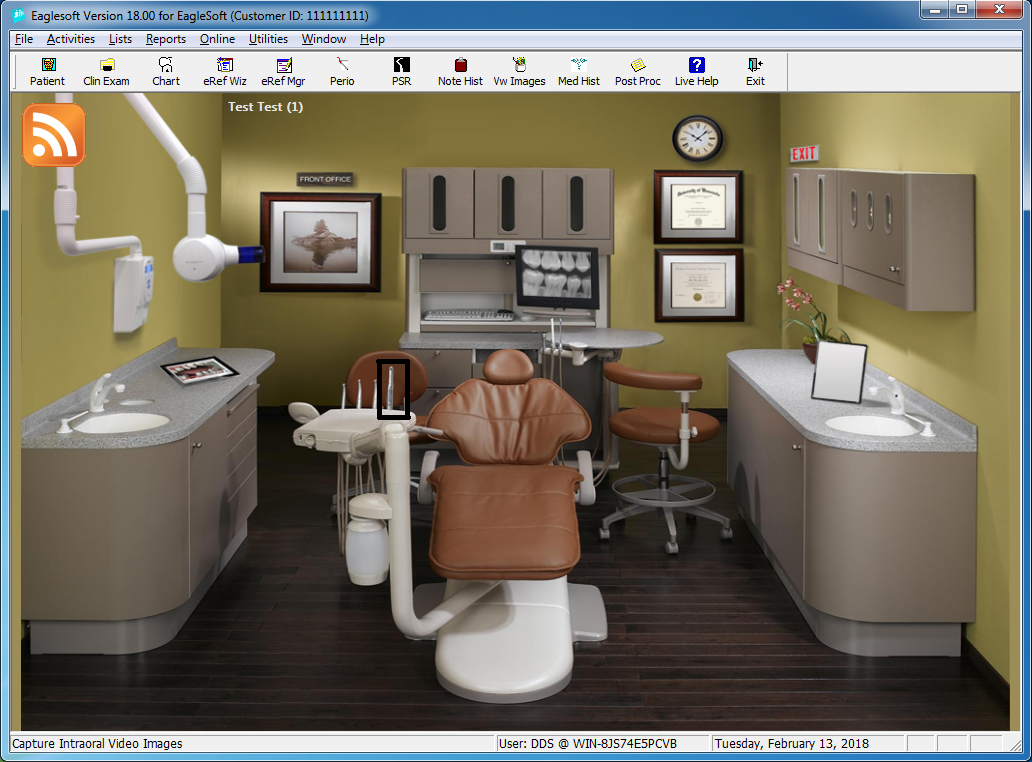
5. Click on the Intraoral Camera to the right of the Red Chair, I have drawn a square box around it. This brings up the Intraoral Camera for Eaglesoft. If it asks you to select a patient, go ahead and chose a patient from the list.
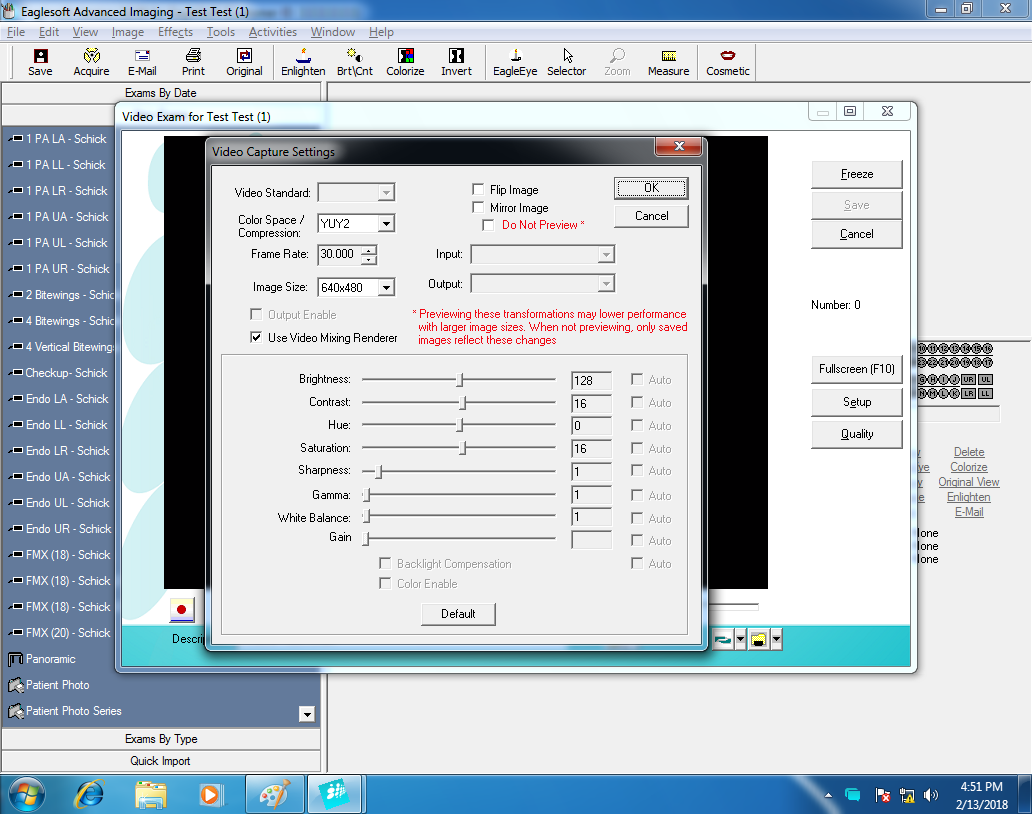
6. Now the Video Exam window will appear, this is the window you take intraoral images. Click the Setup buttom, so the Video Capture Settings window appears. Change the Color Space/Compression setting to YUY2 or RGB24 if you have the option. Don’t use MJPG with Eaglesoft if you don’t have to. Next click the Default button at the bottom to be sure your Gamma and White Balance settings are correct. Feel free to change these settings. This is a one time setting you should set with Eaglesoft, you don’t need to do this every time you use the camera. Click the OK button when you are finished.
NOTE: If you cannot see a live preview of your camera but you can take images, then try disabling the checkmark box that says Use Video Mixing Renderer and try again. Also update video card drivers. If none of these work, contact me and I will show you a registry file you can use that will fix the issue with Eaglesoft and Windows 10.
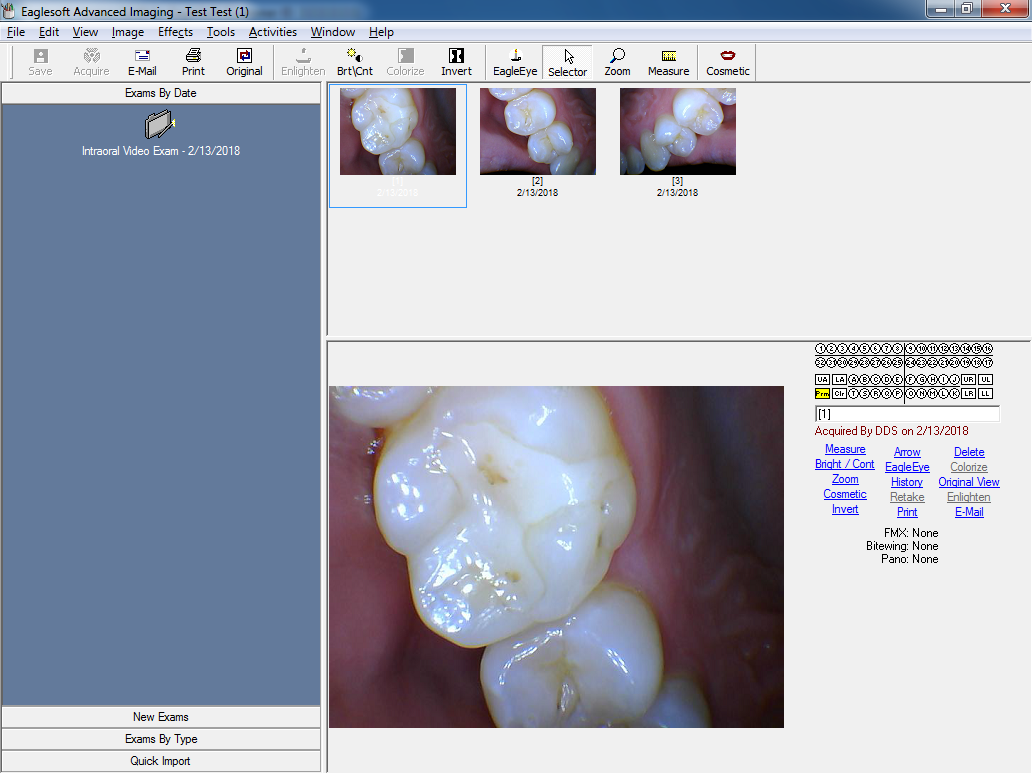
7. Now it is time to take some images! Use the capture button on your camera to take images, and every time you do, the Number will increase incrementally, letting you know that Eaglesoft has taken the image. Close the window when you are finished taking images and the images will be in Eaglesoft.