IOC Snapshot Intraoral Camera Manual for Apteryx XV Web
For this setup, I am going to install IOC Snapshot configured for 2 intraoral cameras, the PerfectCam and the WoodPecker Camera. I am going to install IOC Snapshot and set it up for the Blue and Green Camera. The Blue Camera will be configured for the Perfect Cam and the Green Camera will be configured for the Woodpecker. This scenario is if you have 2 different intraoral cameras and want the computer to use either camera.
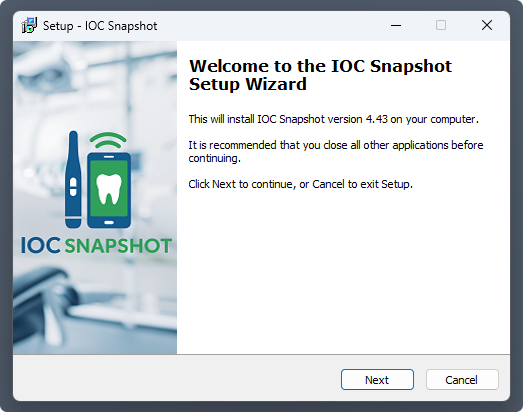
1. Install the IOC Snapshot software. If you need a link for the download, it is:
https://iocsnapshot.com/IOC_Snapshot.exe
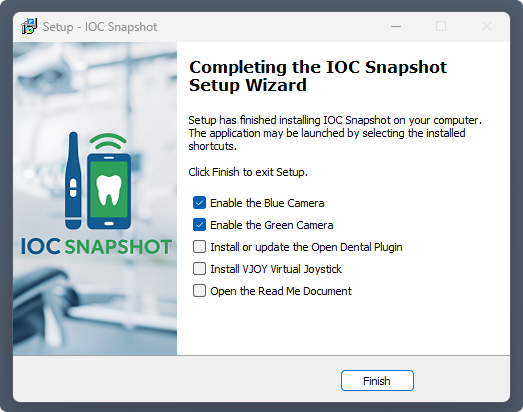
At the end of the installer you will see this window with checkmark boxes as options. Checkmark the Green camera as the Blue Camera will already be checkmarked.
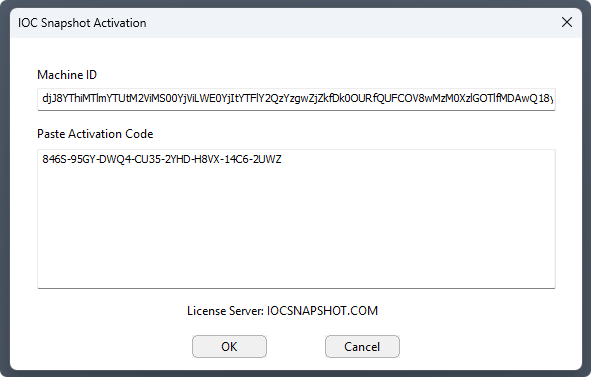
Enter in the license key when you see this window. If you would like to use a trial key, this one is good for 2 weeks.
846S-95GY-DWQ4-CU35-2YHD-H8VX-14C6-2UWZ
2. Now we are going to configure the Blue and Green Cameras. They have icons in the system tray. Each program needs to be told what camera you are using and what program you are using.
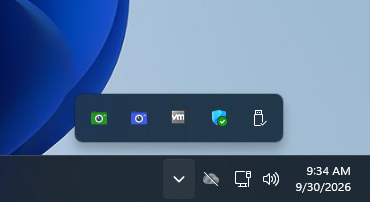
Right click the Blue Camera and go to Select Camera and I will choose PERFECT CAM. Right click the Blue camera again and select Apteryx.
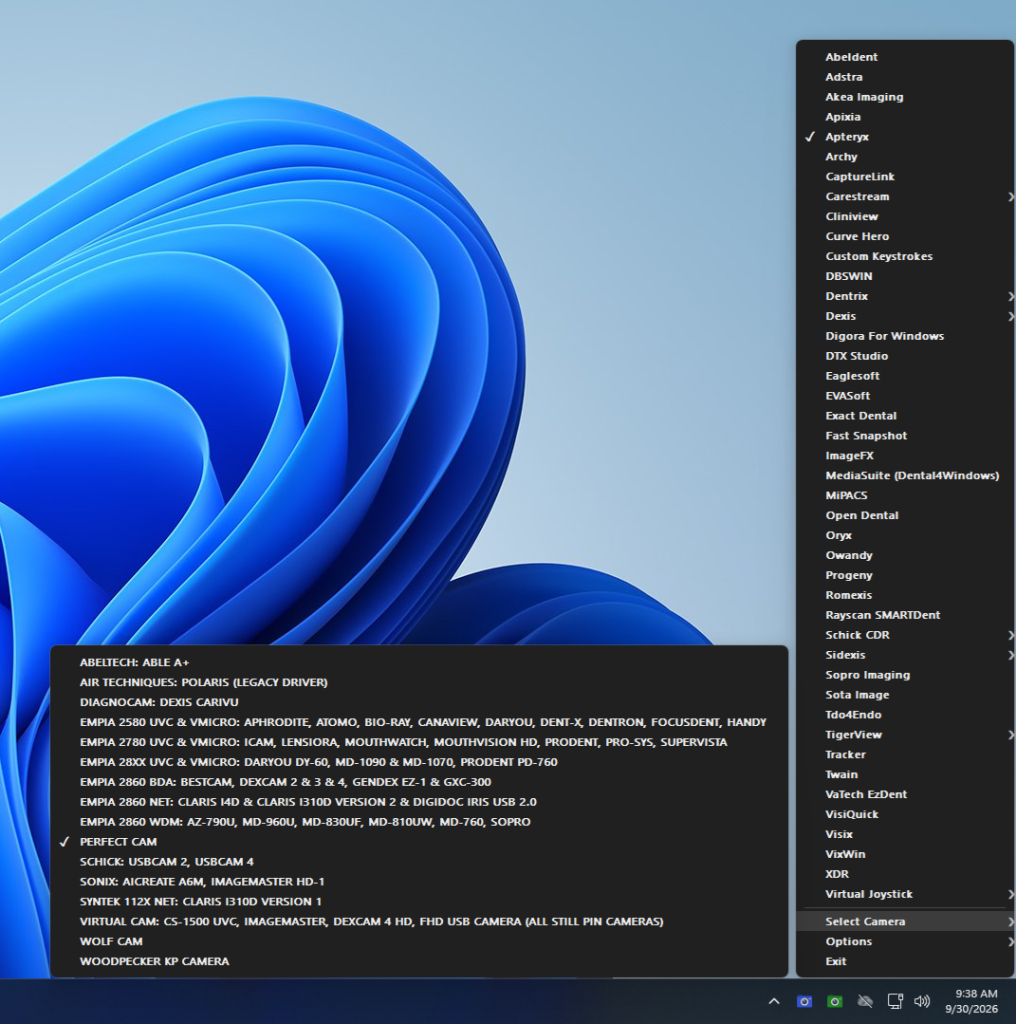
Repeat this for the Green Camera except choose the WOODPECKER KP CAMERA.
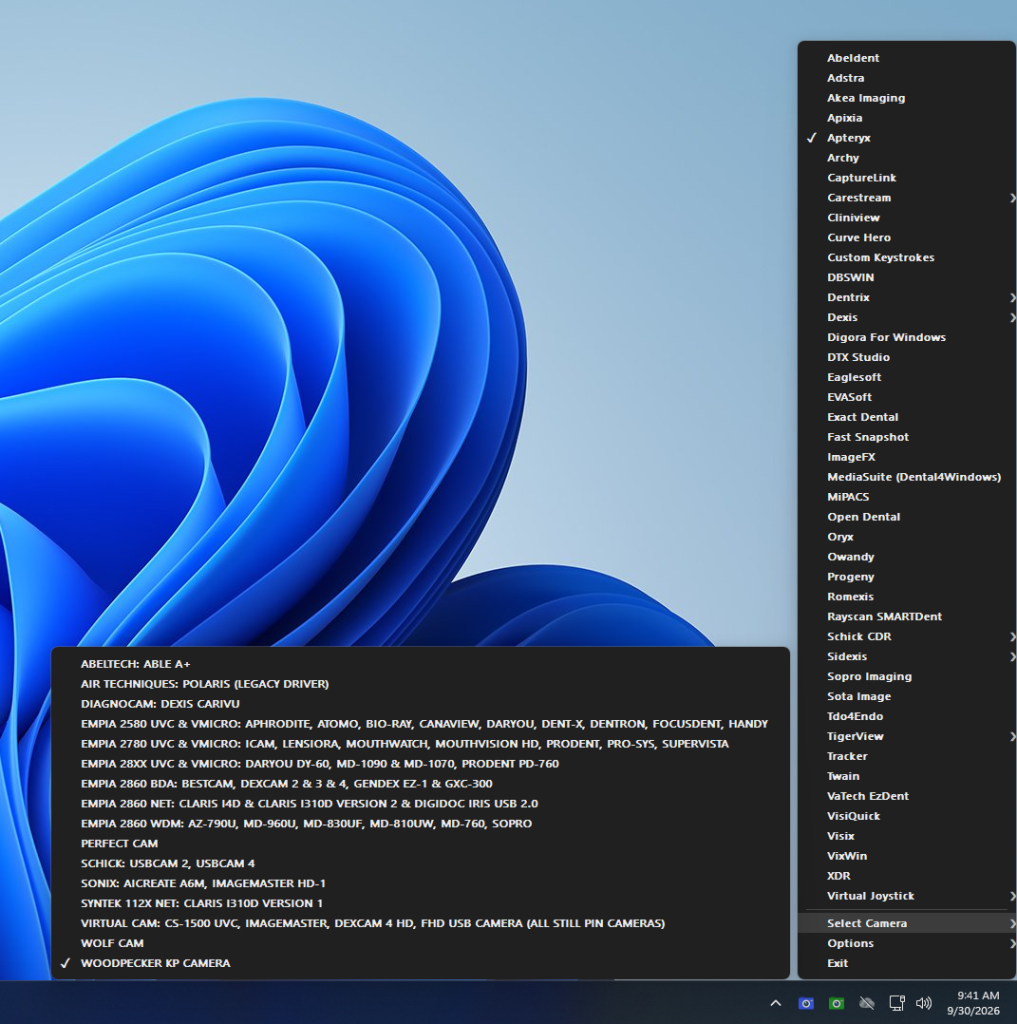
Now both the Blue and Green camera have been configured.
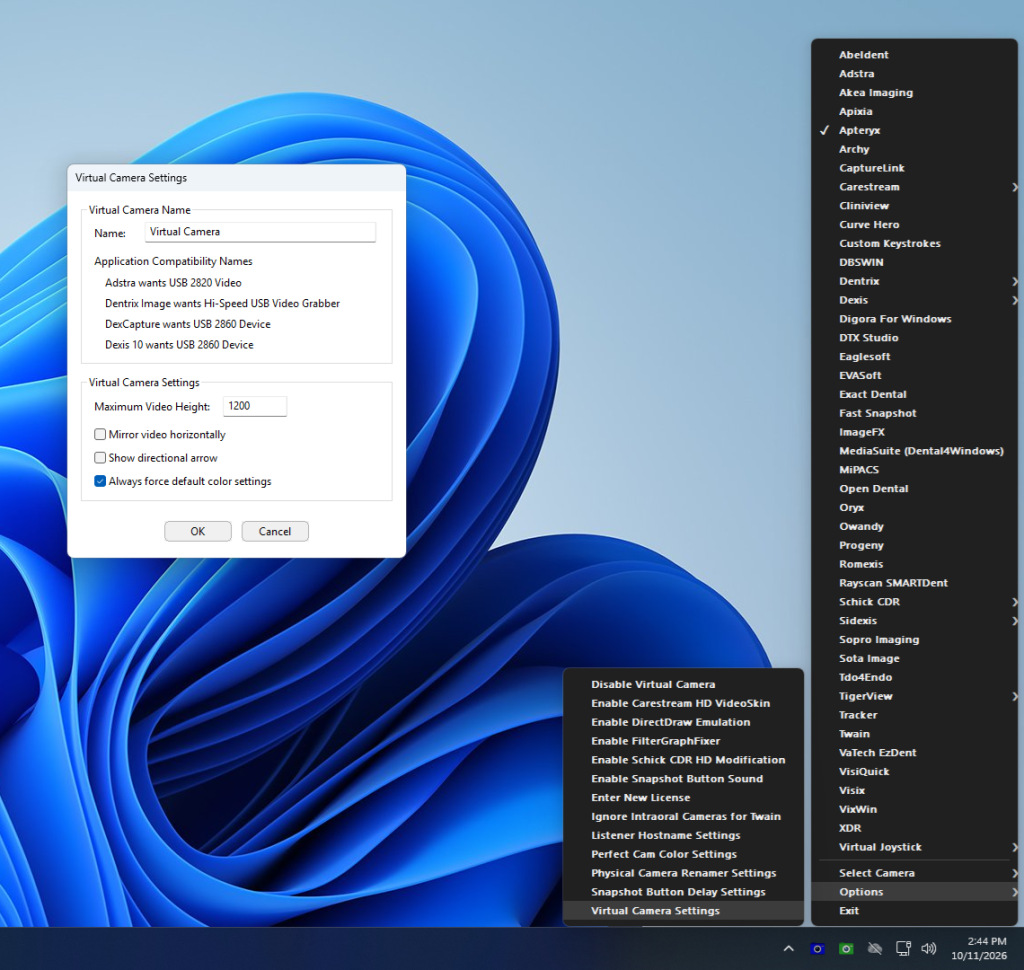
3. Configure the Virtual Camera. Right click either the Blue or Green Camera, go to Options and click Virtual Camera Settings. Set the Virtual Camera Maximum Height to 1200. Checkmark the box that says Always Force Default Color. This will ensure that you can switch between the 2 different physical cameras and Apteryx won’t set the color based on the previous camera that was present. Click OK to save the settings.
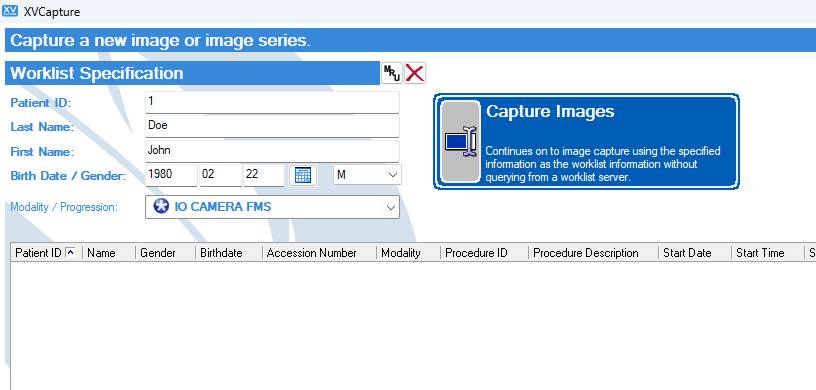
4. When inside XV Capture, select a patient and change the Modality to IO CAMERA FMS. Click on Capture Images.
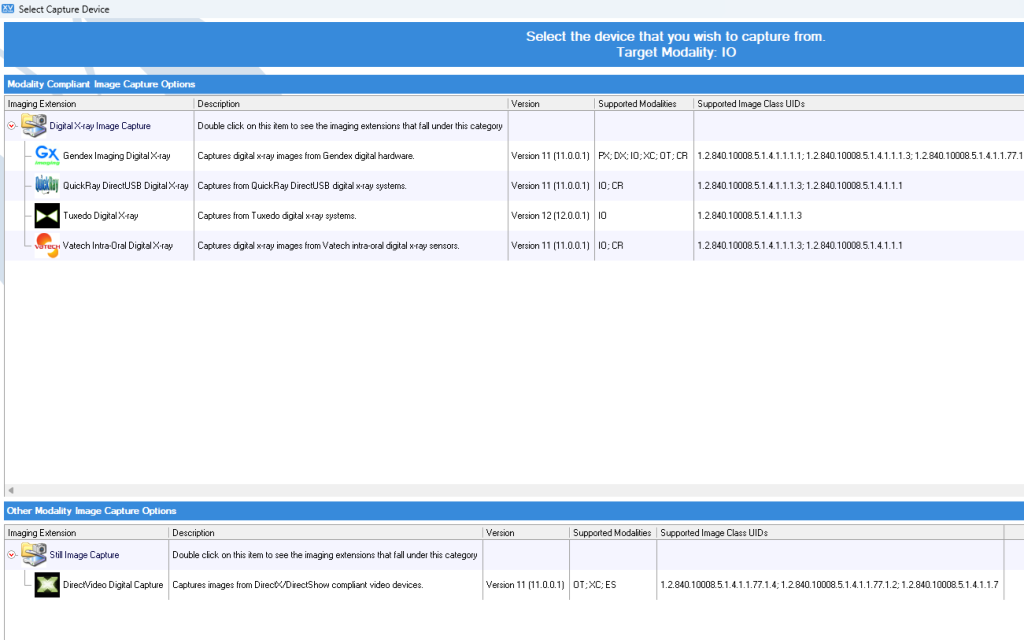
5. Double Click on DirectVideo Digital Capture at the bottom.
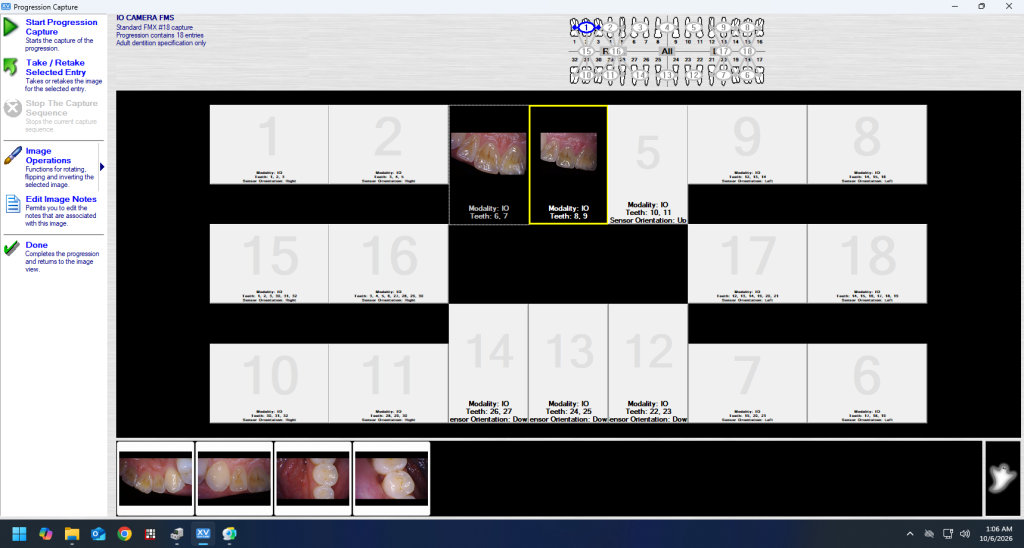
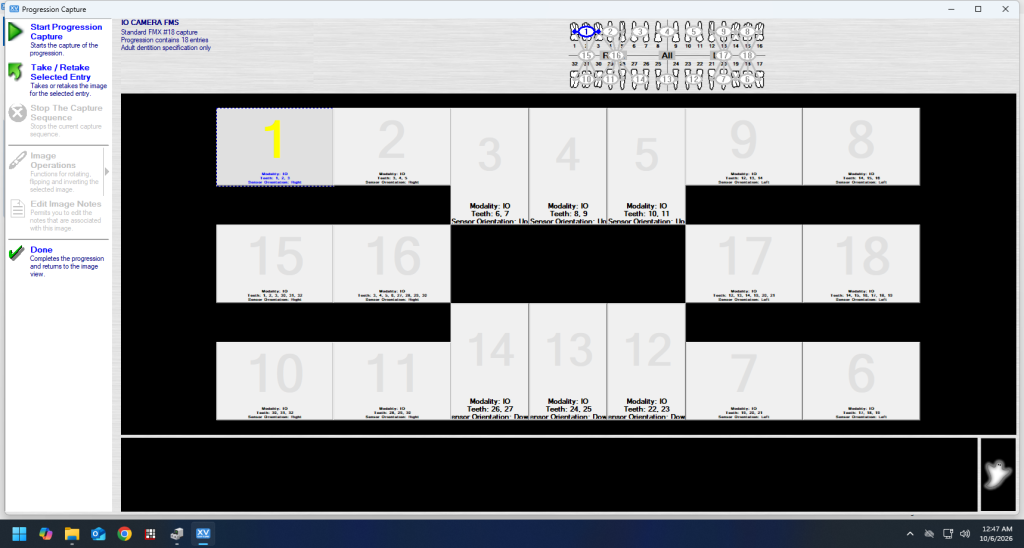
6. Click on Start Progression Capture button.
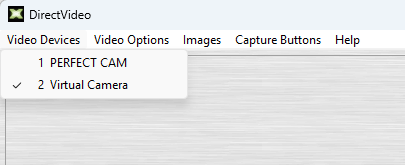
7. Change the drop down to Virtual Camera in the DirectVideo window.
8. Start taking pictures with the camera’s capture button. Click Done when finished.
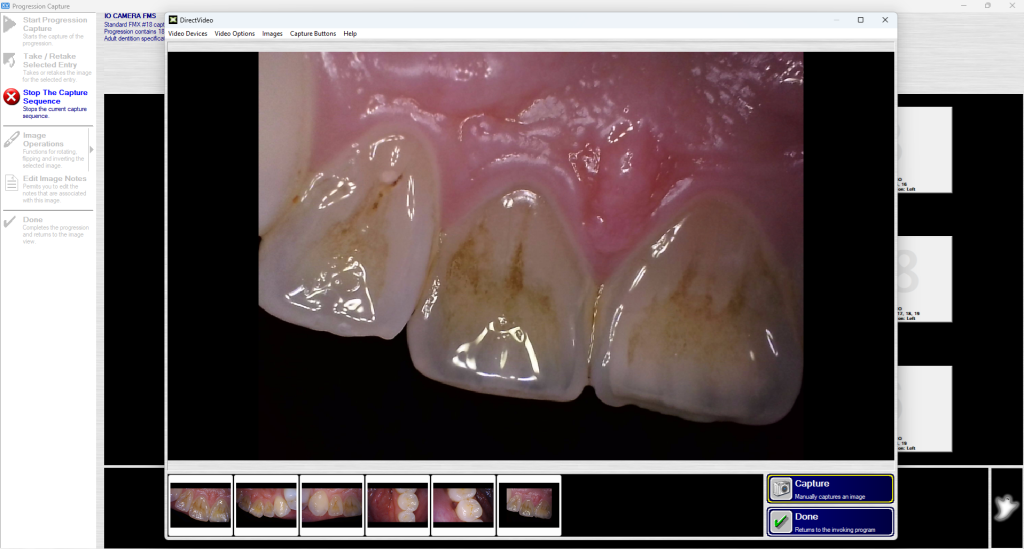
9. Drag the capture images to the appropriate tooth numbers in the FMS mount and click Done.