Perfect Cam Manual for Sopro Imaging
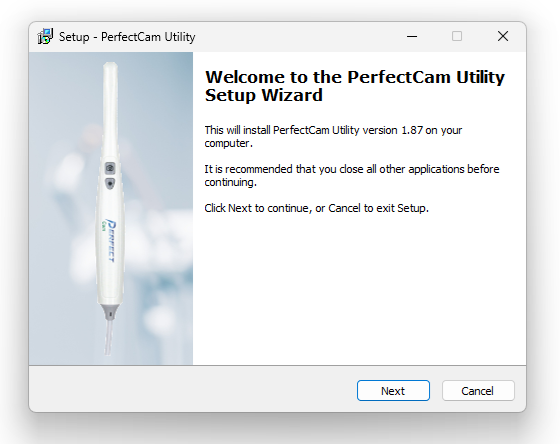
1. Install the PerfectCam Utility software. If you need a link for the download, it is:
https://iocsnapshot.com/PerfectCamSetup.exe
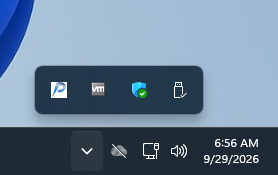
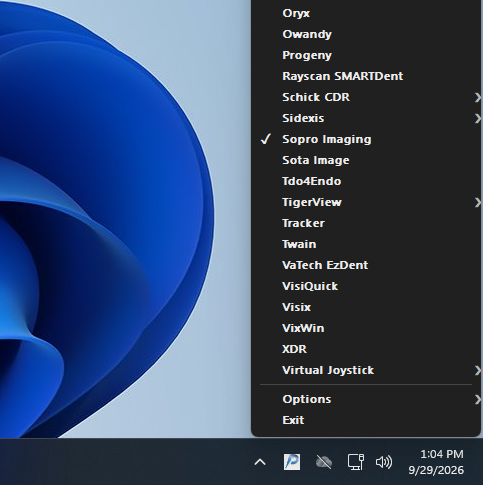
2. After the installation, you will see the PerfectCam icon in your system tray. Right-click it and select Sopro Imaging.
3. Run the Sopro Imaging and click on File and then click on Setup.
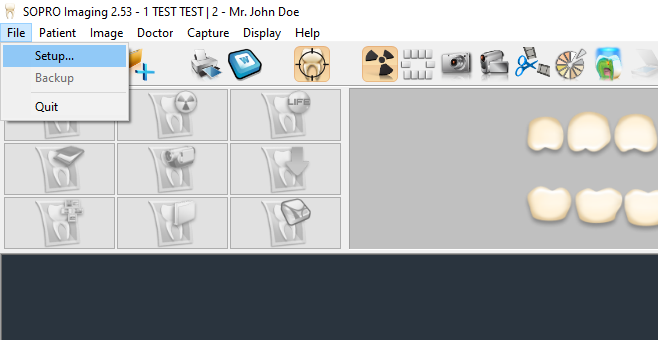
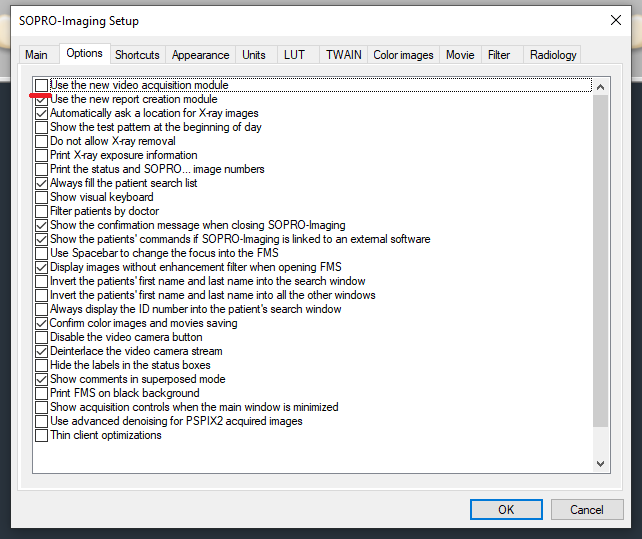
4. This setup may not exist in older versions of Sopro Imaging. Go to the Options Tab and uncheck Use the new video acquisition module. This new video acquisition module only works with Sopro cameras.
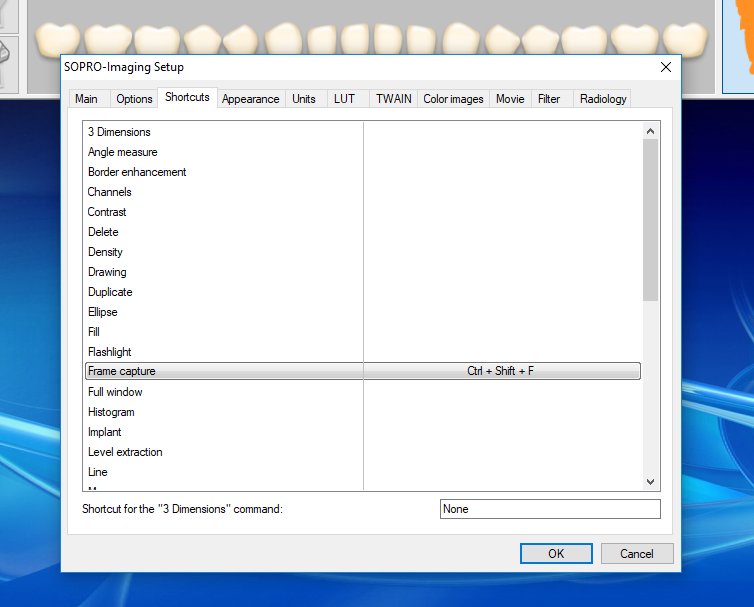
5. Click on the Shortcuts tab, then click on Frame capture and hit the Control and Shift button on the keyboard, then hit the F key on your keyboard, when finished it should look like the screen below.
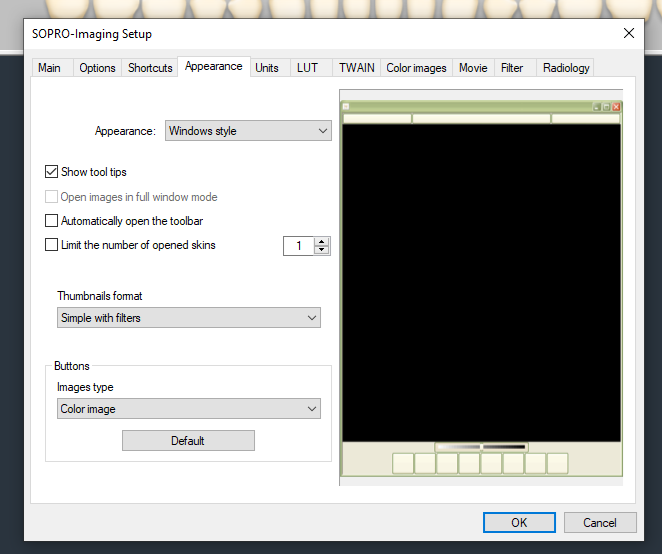
6. Go to the Appearance tab and change the Appearance to Windows style, this will show a larger preview of the camera.
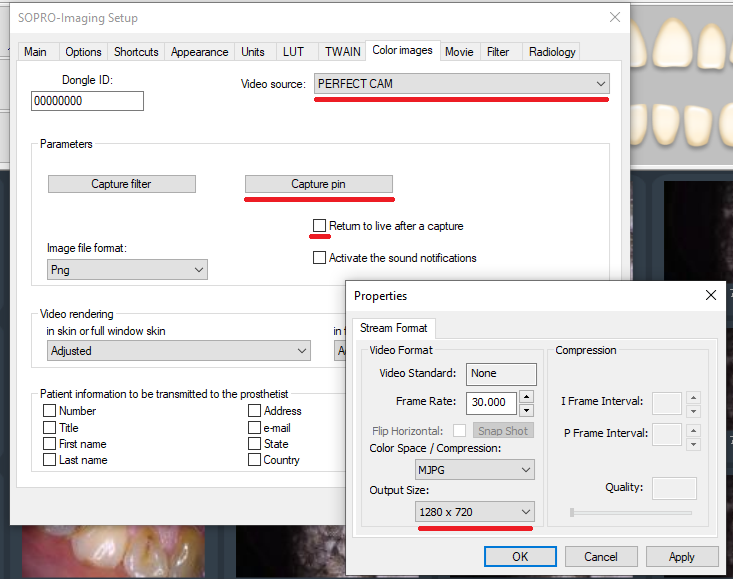
7. Go to the Color images tab, change the Video source to PERFECT CAM, be sure Return to live after a capture is unchecked. Next click the Capture Pin button and be sure the resolution is set for 1280×720. Click the OK button and then the next OK Button to close this window.
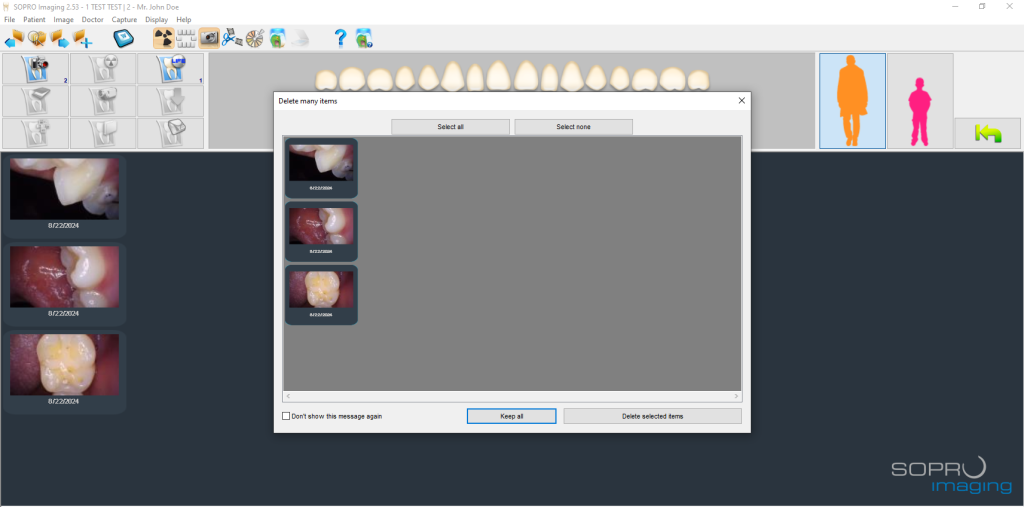
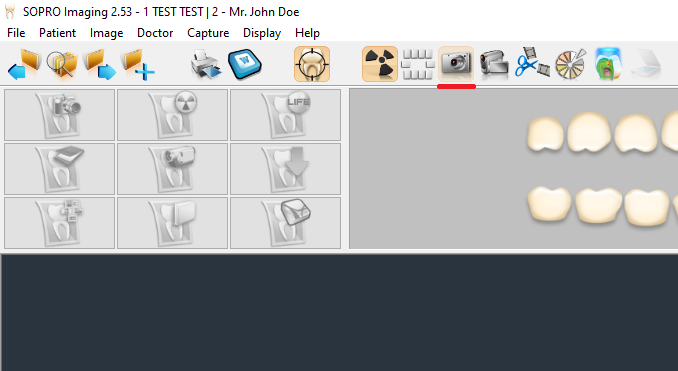
8. Now you are ready to take images! Click the camera button on the toolbar to proceed!
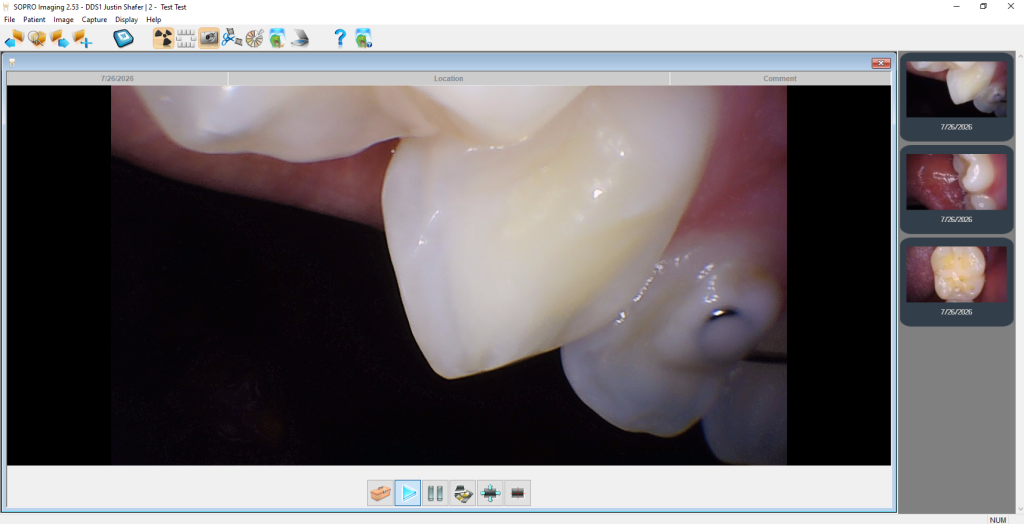
9. Use the camera’s capture button to take images; when you are finished, click the X.
10. Click on Keep all to save all the images.