TigerView 8
1. Install the IOC Snapshot software. If you need a link for the download it is:
https://iocsnapshot.com/IOC_Snapshot.exe
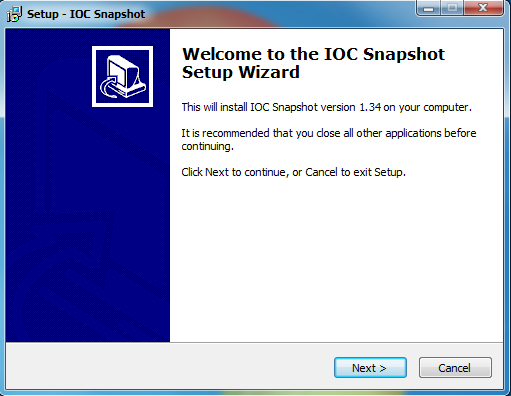
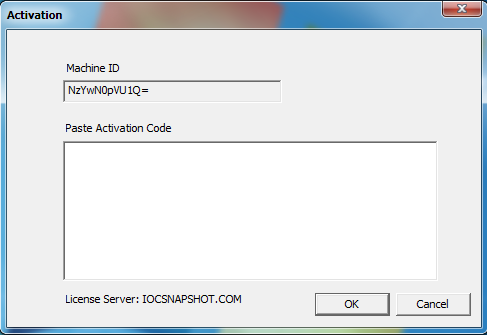
Enter in the license key when you see this window. If you would like to use a trial key, this one is good for 2 weeks.
846S-95GY-DWQ4-CU35-2YHD-H8VX-14C6-2UWZ
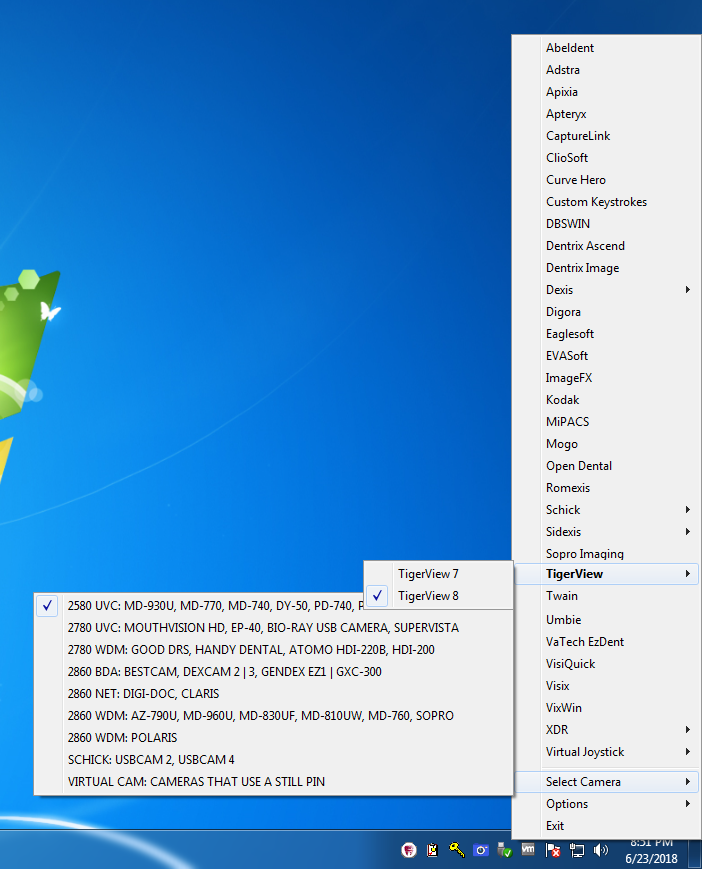
2. After the installation you will see a blue camera icon in your system tray, right click it and go to TigerView, then select TigerView 8. Right click the blue camera again and go to Select Camera, and choose the camera you want to work with. The checkmark boxes should look similar to this:
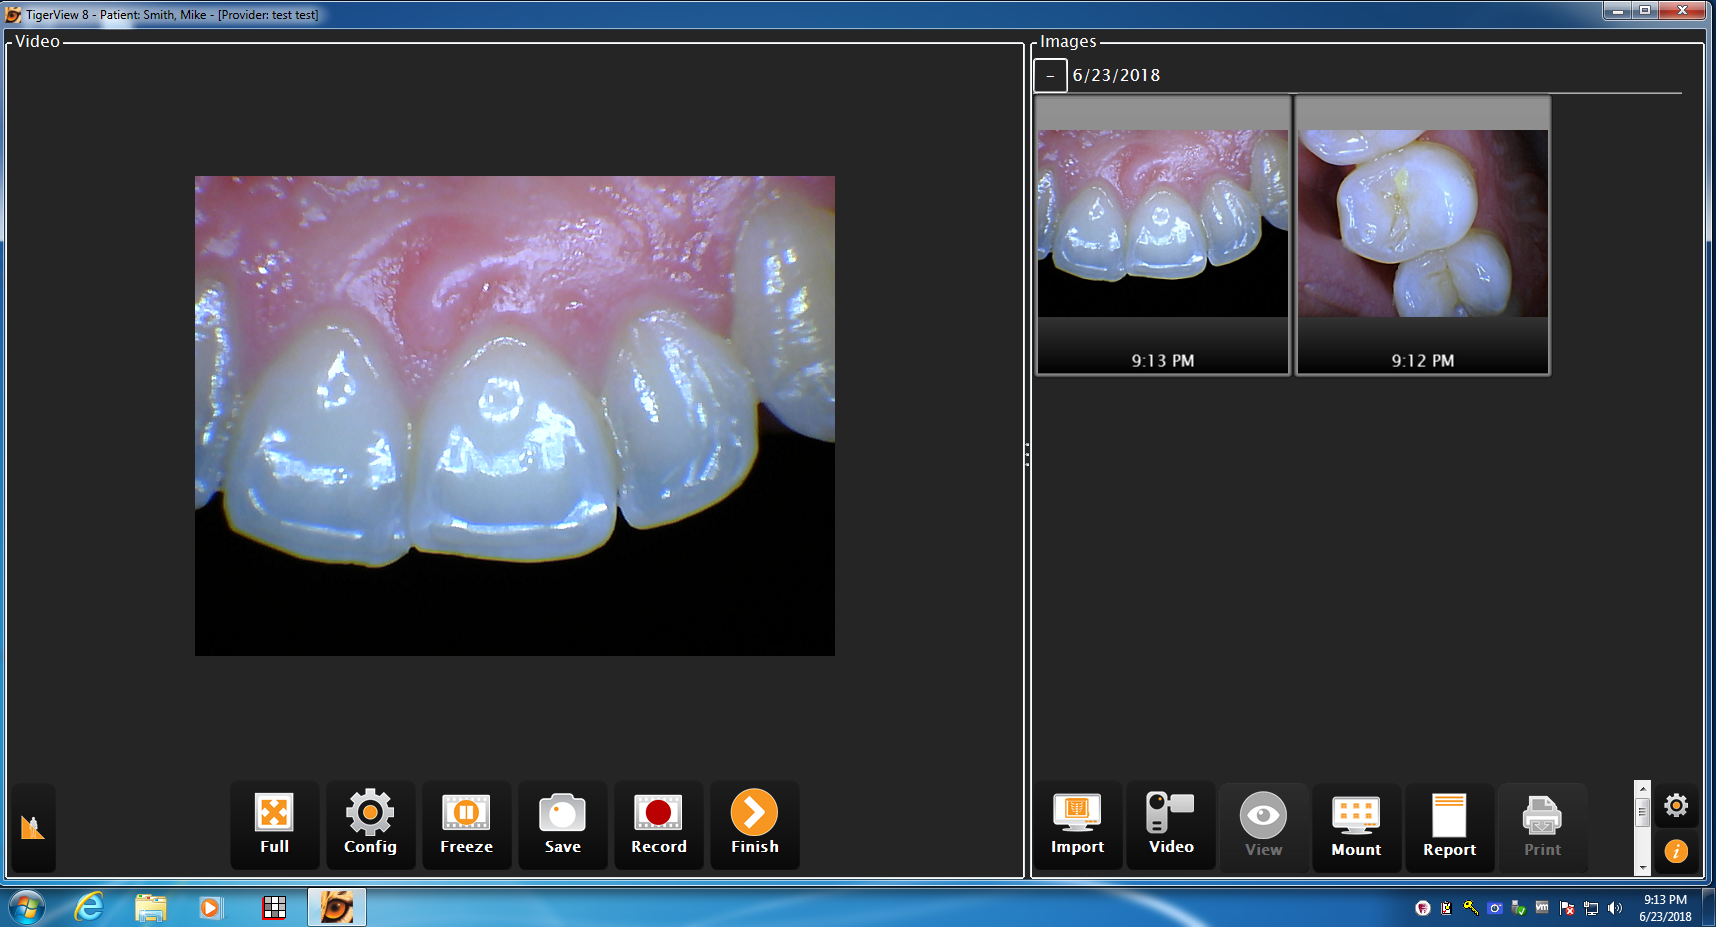
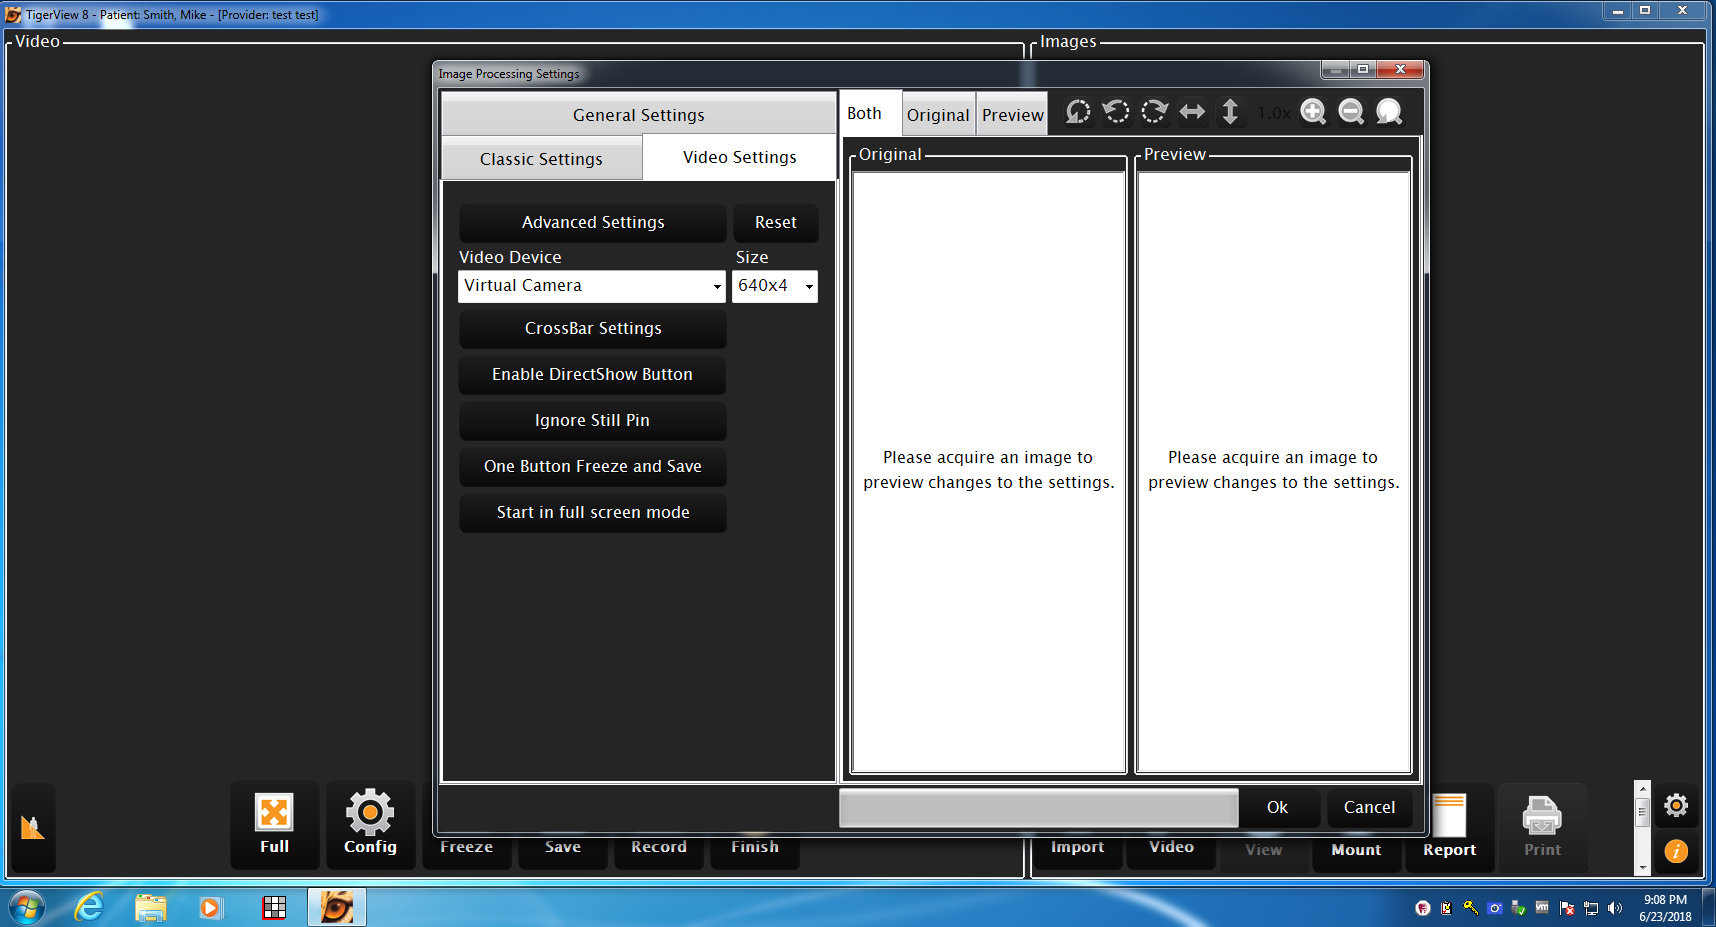
3. Run TigerView and select a patient, then click on the Video icon. Then click the Config icon and go to Video Settings. Change the Video Device to Virtual Camera, then click the Reset Button. Click Ok, then close TigerView.
4. Run TigerView and select a patient, then click on the Video icon. Start taking images with the camera’s capture button. All done. I did run into a bug in TigerView where the images taken would not immediately show, I had to close the patient and open it again. I do have a beta version.